

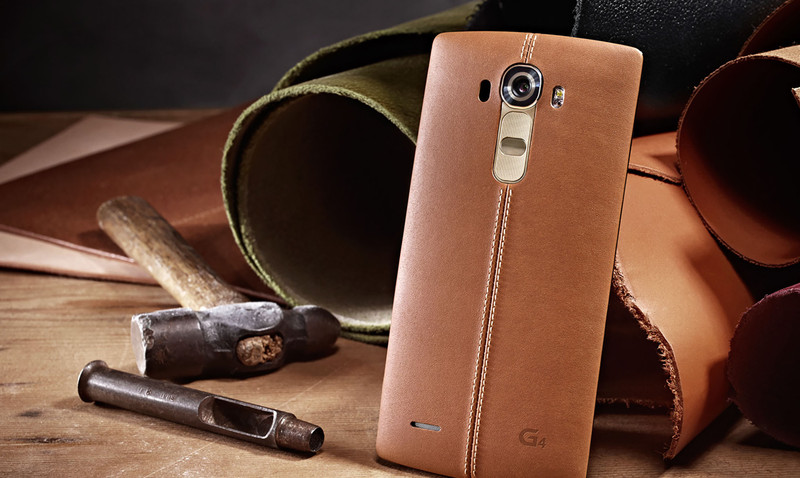
As more people begin to get their hands on the Redmi Note 7 we are going to see people installing various mods incorrectly. That, or we will find people experimenting with certain mods and/or custom ROMs and want a way to get back to stock MIUI. So you can follow these steps to unbrick the smartphone and start over.
I actually wanted today’s article to be about how to install TWRP as the custom recovery on the smartphone but that didn’t work out. You can hear about the issue I ran into by watching the beginning of the embedded video down below. Nevertheless, even restoring the stock recovery.img and boot.img file helped me get back to a working device.
This is going to happen to a lot of people so knowing how to “unbrick” the Redmi Note 7 is going to be very useful.
Not only that, but this tutorial will also help teach people how to return to stock MIUI. See, when you install TWRP (or most other mods), then you can no longer install OTA updates through traditional means. You’ll either need to manually find them online and flash them in TWRP or you’ll have to go without.
This tutorial will also be helpful for those who are wanting to experiment with custom ROMs. I will always recommend that you create a Nandroid backup of your stock ROM ahead of time. But so few people actually do that. So if you’re wanting to switch back from a custom ROM to MIUI then this guide will help.
Lastly, this is likely something you will want to do if you plan on selling the Redmi Note 7 to someone else. Just make sure you disconnect your Mi Account ahead of time.
Warning – Completing the tutorial listed below will wipe all of the data from your smartphone. This includes SMS text messages, photos, videos, apps, games, contacts and anything else. Make sure you manually back up your data to your PC or in the cloud.
Time needed: 10 minutes.
How to Unbrick the Redmi Note 7 and Return to Stock MIUI
- Download the Fastboot MIUI 10 Fastboot ROM for the Redmi Note 7
Redmi Note 7 Chinese ROM – Redmi Note 7 Global ROM – Redmi Note 7 Pro Chinese ROM – Redmi Note 7 Pro Global ROM
- Power off the smartphone
- Boot the Redmi Note 7 into Fastboot Mode

- Connect the device to the PC with the USB Cable
- Extract the contents of the Fastboot ROM downloaded in Step #1
- Move or copy the files inside the extracted folder to your ADB/Fastboot folder and then double click on the flast_all.bat file
Yours may just say flash_all if you aren’t showing extensions (.BAT file is for Windows, .SH file is for Linux/macOS).

- Wait for the Command Prompt to open and watch as a lot of text begins scrolling down the window
- When the script is finished, the Redmi Note 7 will reboot on its own and you’ll see a message at the bottom of the Command Prompt saying to press any key.
- Wait for the Redmi Note 7 to boot back up and then activate MIUI again
This boot cycle will take a long time as we have erased everything on the smartphone and are starting over from scratch.
In previous unbrick/return to stock tutorials that I have done I recommended using the Mi Flash program. If you’re familiar with that tool and know how to use it then you can use it for this guide if you want. The end result is the same with your smartphone booting back into a clean install of MIUI.
The thing is, I started seeing people having trouble with that program. I believe the root cause of those issues were a space in the folder path of the MIUI Fastboot ROM. For example, if the folder path was something like E:\Redmi Note 7\ and you copied and pasted that into Mi Flash then it would give you an error.
The program expects there to not be any spaces in the folder path so it would need to be something like E:\Redmi-Note-7 or whatever. Which is find if you put the firmware in the base of a drive but it makes things overly complex if you extracted the Fastboot ROM in some place like E:\Android ROMs\Xiaomi\Redmi Note 7\ or something.
I hope you get my point because not using the Mi Flash tool is actually easier in my opinion.
Returning the Redmi Note 7 to Stock MIUI Android
All the program did was look for the various script files that are included in the Fastboot ROM for MIUI. If you extract the contents of the download in Step #1 then you’re going to file ‘script’ files like flash_all, flash_all_except_data_storage, and flash_all_lock. And the program simply executed one of those scripts.
It did make sure that your computer detected the phone’s USB drivers and it did make sure you are in Fastboot Mode. But I think anyone who need to unbrick their Redmi Note 7 or return the Redmi Note 7 Pro back to stock MIUI Android then you will have that situated already.
In fact, if you look in the tutorial above (or watch the video) then you see that I show you how to boot into Fastboot Mode.
As of writing this, the only Fastboot ROM that is currently available is for the regular Chinese version of the Redmi Note 7. I imagine they will be releasing this phone globally so in the future I will add a link for the Global version. I also know that a lot of people are looking forward to the Redmi Note 7 Pro.
So once Xiaomi launches that phone then I will include a link to the Chinese Fastboot ROM for the Redmi Note 7 Pro and then I will include a link to the Global Fastboot ROM when that phone gets released internationally.


Just AWESOME!
Thanks for sharing,
I installed twrp and xiaomi.eu rom then I got into trouble on my device. There is no sites that showed me how to get my redmi note 7 to the original state. Thank you and I’m looking forward to the global rom.
This tutorial will get you on the Chinese ROM, but yea, just like you I am looking forward to the Global ROM as well. I have had a lot of requests for this tutorial.
can i try it on my redmi note 7 locked phone , its locked and stock on boot animation then its goes back to recovery mode any idea please help me
the bootloader needs to be unlocked
Hi, I tried Flashing the Global ROM on my Redmi Note 7 because it was a Chinese version, but I got an error message “Flash System Error” and when I removed my phone from the laptop and tried to boot it, it didn’t go past the Redmi Note 7 logo screen.. And it has been going on and off since then.. Please help me. I can’t use the phone again. Please help me
I assume you did this by launching the flash-all.bat script? That is going to produce a lot of text as it flashes multiple image files.
At which point did you get that error? Do you have a screenshot of it?
Hello, can I go from “Global EEA” to “Global” version?
I don’t have the Global EEA hardware, but you should (as I have gone from China ROM to Global ROM). Just be sure to follow this tutorial
– https://www.techexplained.co/redmi-note-7-install-global-miui/
Thanks, unbricked my Redmi Note 7 pro to Chinese rom, but now it won’t sync my Google contacts. Tried two different tutorials /posts but they didn’t work, any ideas? Also looking forward to Global rom for Note 7 pro.
Hi
When I dbl click on the bat file, nothing happens. Can you help?
I have the latest drivers, but the .bat file won’t run and my device is not recognised.
I can boot into fastboot, and TWRP on my phone, and tmy PC make a connection sound when I plug in the USB.
Thank you soo much… you are genius…
should I install a xiaomi.eu rom and another recovery on top of that or should i just leave it
You likely want to keep TWRP installed in case you need to manually install new updates
tried to install xiaomi.eu rom but it cause my phone in trouble..
hv tried many step on utube but still the same..
can’t use my phone right now…
I have a global veraion of redmi note 7, can I followed yoir tutorial or it will take me to the Chinese rom
You definitely can. Just be sure that you download the “Global” Fastboot ROM in step 1
Hi i just want to return back from custom to stock recovery image so that i can install the ota update..bootloader is unlocked and rooted with magisk.pls guide me where to find the stock recovery img.
if you download and extract the contents of the latest ‘fastboot rom’ for your device, then you’ll find the recovery.img file in there
this works thank you
hello, I tried countless methods and I was hopeful with this one, but it didn’t work, the others show the error ‘Partition flashing is not allowed’, I was in stock rom and with the original recovery and I tried to block the bootloader, my cell phone did and it just appears the fastboot option, would you have any idea how I can solve it?
Hi Luiz,
An error like “Partition flashing is not allowed” sounds like it is related to the bootloader. Have you unlocked the bootloader yet?
https://imgur.com/a/vXTtMXo
Can you help?
I got stuck using this
https://imgur.com/3RWR3Cw
there is no flash_all.bat in the file that you provided, when I flashed the very first one, only black screen keeps appearing and closing and appearing again and again. I think I broke my phone using this method.
Hi Doug, hope you’re well mate.
I’m having trouble here: “Move or copy the files inside the extracted folder to your ADB/Fastboot folder.”
I have some universal ADB installed, but I don’t know how to to copy the extracted files from the ROM to the ADB folder. How do I even access the ADB folder on a windows machine? It looks like you just double-clicked on the .bat file without doing the copying step. Can I just double click on the .bat file without doing the copying step or will that screw it up even more?
Thanks for this by the way, closest I have gotten to being unable to brick my phone :/