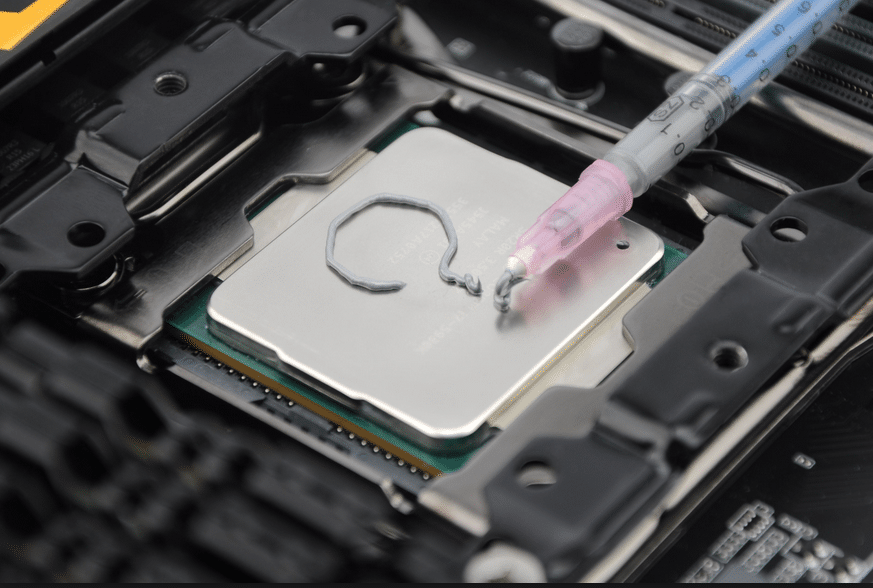
Thermal paste is a crucial component in ensuring optimal thermal conductivity between your CPU and cooler. The application pattern you choose can significantly impact your system’s temperature and overall performance. After extensive testing on various CPUs, we’ve discovered the best thermal paste application patterns for different scenarios. In this comprehensive guide, we’ll explore each pattern in detail and discuss their pros and cons.
Pea Method: The Classic Approach
The pea method is one of the most widely used and reliable ways to apply thermal paste. Here’s how it works:
- Place a pea-sized dot of thermal paste in the center of your CPU.
- Attach your cooler, allowing the paste to spread naturally when you secure it in place.
Pros:
- Easy to judge the necessary amount.
- Minimal chances of paste spillage.
- Suitable for most CPUs, including those without integrated heat spreaders(IHS).
- Works well with thermal paste of varying viscosities(medium viscosity is ideal).
Cons:
- May not spread to the edges of the CPU, potentially leaving corners with less coverage.
- Can result in a slightly thicker layer in the center, increasing overall thermal resistivity.
Best Way to Apply: Simply squeeze a pea-sized amount of paste onto the center of your CPU die or IHS. Avoid shaking the thermal paste tube excessively to prevent the formation of air pockets, which can reduce the paste’s lifespan.
X-Pattern: Ideal for Larger CPUs
The X-pattern is another popular method, especially suitable for larger processors like Threadripper. It involves applying the paste in the shape of an ‘X’ or two diagonal lines that intersect at the center of the CPU.
Pros:
- Provides a good overall spread on the processor.
- Minimal chances of air pockets.
- Suitable for thermal paste with low to medium viscosity.
- Ideal for larger CPUs.
Cons:
- Slight risk of paste spillage from the corners.
- Challenging to determine the optimal paste amount.
- Not suitable for highly viscous thermal pastes or electrically conductive ones like liquid metal.
Best Way to Apply: Create thin, continuous diagonal lines with the paste, ensuring that the lines do not extend all the way to the CPU’s corners.
Buttered Toast: Precision Spread
For those who prefer a hands-on approach, the “buttered toast” method involves manually spreading the thermal paste over the CPU’s surface using a thermal paste spreader.
Pros:
- Achieves the best spread over the processor’s surface.
- Ideal for thermal paste with medium viscosity.
- Low risk of paste spillage when the right amount is used.
Cons:
- Time-consuming to apply correctly.
- Higher chances of air pocket formation.
- Difficult to determine the suitable amount.
- Not suitable for highly viscous thermal pastes or electrically conductive ones.
Best Way to Apply: Apply the paste as a straight, continuous line from one side to the other, spreading it gradually to ensure a smooth, even layer. Avoid spilling the paste onto the motherboard while spreading.
Single Line: Easy and Efficient
The single-line method involves applying a single straight line of thermal paste from one side of the CPU to the other.
Pros:
- Easy to determine the necessary amount and apply.
- Minimal risk of air pockets.
- Suitable for thermal paste with low to medium viscosity.
Cons:
- May not spread evenly to all sides and corners.
- Possibility of paste spillage along the sides closest to the line ends.
- Thickness in the middle may increase overall thermal resistivity.
- Not suitable for highly viscous thermal pastes.
Best Way to Apply: Ensure that the ends of the line do not touch the sides of the CPU. The thickness of the line should strike a balance between being too thin and too thick.
Double/Triple Lines: Enhancing Spread
To improve paste spread compared to a single line, you can apply multiple parallel lines symmetrically on the CPU. This method allows for better coverage.
Pros:
- Paste will spread more evenly to all sides.
- More even thickness across the layer.
- Suitable for thermal paste with low to medium viscosity.
Cons:
- May not reach the corners.
- Risk of paste spillage along the sides closest to the line ends.
- Possibility of air pocket formation.
Best Way to Apply: Make each line thin and continuous. Ensure that the lines do not touch the CPU’s sides.
5-Dots: Comprehensive Coverage
The 5-dots method involves applying five dots of thermal paste to the CPU. Four dots are placed at the corners, while the fifth goes in the center. This method ensures extensive coverage.
Pros:
- Easy to apply.
- Even spread over the processor.
- Suitable for larger processor chips.
- Works well with thermal paste of medium viscosity.
- Low risk of paste spillage.
Cons:
- Increased chances of air pocket formation.
- Slightly challenging to determine the necessary amount.
Best Way to Apply: Apply a small dot-shaped thermal paste in the center and four smaller dots near the middle point between the center dot and the corners.
Testing and Results
To evaluate the effectiveness of these thermal paste patterns, we conducted extensive testing using HY510 thermal paste on an Intel i3-12100 CPU with a stock Intel cooler. Our components included:
- Processor: Intel i3-12100(no overclock)
- CPU Fan: Intel Stock Fan
- Motherboard: MSI PRO B760M-E DDR4
- Thermal Paste: HY510
The temperature range for the CPU during idle state was 34-38.5°C. During a single-core stress test, the temperature ranged from 49.3 to 54.6°C.
In our testing, the pea pattern yielded the best results, closely followed by the cross pattern. Keep in mind that the spread of thermal paste can vary depending on the pattern used, making direct comparisons challenging.
Conclusion
In conclusion, the choice of thermal paste application pattern should consider factors like CPU size, paste viscosity and personal preference. While the pea method is often the go-to choice, other patterns may be better suited for specific scenarios. Regardless of the pattern, the key is to use the right amount of thermal paste and avoid excess spillage for optimal thermal conductivity.
Remember that precise application and thorough testing are essential for achieving the best thermal performance for your CPU and cooler combination.
Other Technical Reviews:- Reviews