Are you a Samsung device user looking to customize your device or fix software issues? Look no further than the Samsung Odin Flash Tool. In this comprehensive guide, we will take you through the process of downloading and installing the Odin Flash Tool on your Windows PC. We will also explain what Odin is, its features, and how to use it effectively. So, let’s dive in and explore the world of Samsung Odin!
What is Samsung Odin?
Samsung Odin is a powerful flash tool specifically designed for Samsung devices. It allows users to flash firmware binaries onto their Samsung smartphones and tablets. With Odin, you can update your device manually, downgrade firmware, fix boot loop issues, install custom recoveries like TWRP, and perform various other customizations. Odin is an essential tool for any Samsung device owner who wants to take control of their device’s software.
Download Odin for Windows
To get started with Odin, you need to download the tool onto your Windows PC. There are several versions of Odin available, and you should choose the one that is compatible with your device and firmware. Here are the download links for different Odin versions:
| Odin Version | Download Link |
|---|---|
| Odin v3.14.4 (Latest) | Download Odin v3.14.4 |
| Odin v3.14.1 (Stable) | Download Odin v3.14.1 |
| Odin v3.13.3 | Download Odin v3.13.3 |
| Odin v3.13.1 | Download Odin v3.13.1 |
| Odin v3.12.7 | Download Odin v3.12.7 |
| Odin v3.11.2 | Download Odin v3.11.2 |
| Odin v3.10.6 | Download Odin v3.10.6 |
Make sure to choose the appropriate version of Odin based on your device’s firmware and Android version.
How to Install Odin Flash Tool on Windows PC
Now that you have downloaded the Odin Flash Tool, let’s proceed with the installation process. Follow these steps to install Odin on your Windows PC:
Pre-requisites
Before installing Odin, make sure you have the following pre-requisites in place:
- Download and install the latest Samsung USB Drivers on your PC. These drivers are necessary for Odin to recognize your Samsung device.
- Ensure that your device is charged and has at least 50% battery before proceeding with the installation.
Installation Guide
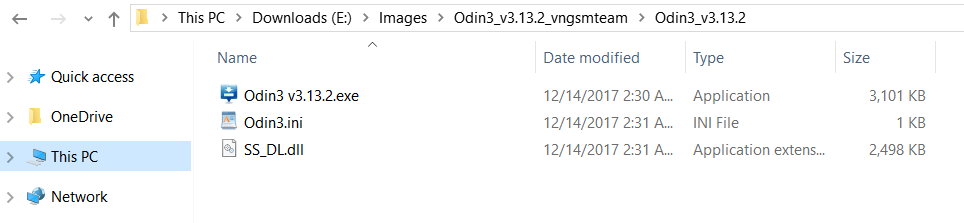
- Extract the downloaded Odin tool zip file using an archive tool like Winrar or 7-Zip.
- Open the extracted folder and locate the Odin executable file (Odin3.exe).
- Right-click on Odin3.exe and select “Run as administrator” to launch the tool with administrative privileges.
- If a warning message appears, click “OK” to continue.
- Congratulations! You have successfully installed Odin on your Windows PC.
Understanding Odin Flash Tool Options
When you open Odin, you will see a variety of buttons and options. To make the most out of Odin, it’s essential to understand these options and their functionalities. Here’s a quick overview of the main Odin options:
BL: This option is used to flash the bootloader file on your Samsung device.
AP: Formerly known as PDA, this option is used to flash single-file firmware and recovery images.
CP: This option allows you to flash the Modem file that comes with the Samsung firmware binaries package.
CSC: CSC stands for Consumer Software Customization or Country Specific Code. It contains customizations related to a specific geographical location, carrier branding, APN settings, and more.
PIT: The Partition Information Table contains information about the device’s storage partition tables, block sizes, and counts. It is used when flashing a PIT file.
Start: Clicking this button initiates the firmware flashing process.
Log: The log field displays the installation progress and any error messages encountered during the flashing process.
How to Use Samsung Odin
Now that you have installed Odin, it’s time to learn how to use it effectively. Here’s a step-by-step guide to using Samsung Odin:
Make sure your Samsung device is charged and has at least 50% battery.
Download the firmware file for your device from a reliable source.
Extract the firmware file to get the necessary firmware binaries (BL, AP, CP, CSC).
Turn off your Samsung device and boot it into Download Mode. To do this, press and hold the Volume Down + Power + Home buttons simultaneously until you see a warning message.
Connect your device to the PC using a USB cable.
Open Odin on your PC and wait for it to detect your device. The ID:COM port on Odin should turn blue, indicating a successful connection.
In Odin, click on the respective buttons (BL, AP, CP, CSC) and select the corresponding firmware binaries.
Make sure the options “Auto Reboot” and “F. Reset Time” are selected in Odin.
Double-check that everything is set correctly, and then click the “Start” button to begin the firmware flashing process.
Wait for Odin to flash the firmware onto your device. You will see the progress in the log field.
Once the process is complete, your device will automatically reboot.
Congratulations! You have successfully used Samsung Odin to flash firmware onto your Samsung device.
Tips and Tricks for Using Samsung Odin
To ensure a smooth and successful flashing process, here are some tips and tricks to keep in mind:
- Always use the latest version of Odin for compatibility with the latest firmware versions.
- Download firmware from trusted sources to avoid compatibility issues or malware.
- Before flashing firmware, backup your important data to prevent data loss.
- Follow the flashing process carefully and do not interrupt it to avoid bricking your device.
- If you encounter any errors during the flashing process, refer to the Odin log for more information.
- If you need to flash a custom recovery or root your device, make sure to disable “Auto Reboot” in Odin before flashing.
- Use the appropriate firmware binaries for your device model and region to ensure compatibility.
Samsung Odin Alternatives for Mac and Linux
While Odin is specifically designed for Windows PCs, there are alternatives available for Mac and Linux users. Here are two popular options:
Heimdall
Heimdall is an open-source flash tool that is compatible with Linux, Mac, and Windows. It offers similar functionality to Odin and allows users to flash firmware, recovery, and other custom files onto their Samsung devices. You can download Heimdall from the official website.
JOdin3
JOdin3 is a modified version of Odin that is compatible with macOS. It provides a user-friendly interface for flashing Samsung firmware on macOS machines. JOdin3 is based on an older version of Odin but still works effectively for most Samsung devices. You can download JOdin3 from various online sources.
Conclusion
Samsung Odin Flash Tool is a powerful tool that enables Samsung device owners to take control of their device’s firmware. With Odin, you can flash firmware, update or downgrade software, install custom recoveries, and perform various customizations. In this guide, we have covered the download and installation process for Odin on Windows PCs, as well as provided tips and tricks for successful firmware flashing. Whether you are a beginner or an advanced user, Odin is an essential tool for any Samsung device owner. Explore the possibilities with Samsung Odin and unleash the full potential of your Samsung device!