In this tutorial, we will guide you on how to install the TWRP Recovery on Samsung Galaxy S23 and S23 Plus. TWRP recovery is a popular custom recovery that allows users to install custom ROMs/mods, take backups, and gain root access on their phones. If you’re looking to download and install TWRP Recovery on your Samsung Galaxy S23 and S23 Plus, this article is for you.
Samsung Galaxy S23 and S23 Plus Device Overview
The Samsung Galaxy S23 and S23 Plus are powerful smartphones that come with impressive features. Let’s take a closer look at their specifications:
Samsung Galaxy S23
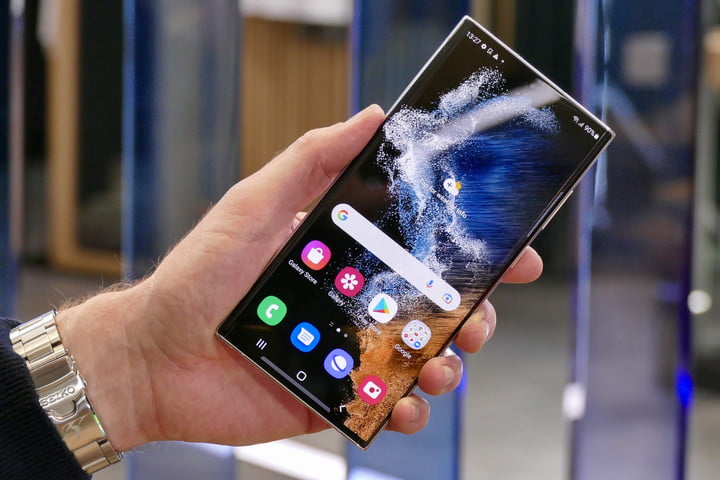
The Samsung Galaxy S23 features a 6.1-inch Dynamic AMOLED display with a 120 Hz refresh rate and HDR10+ compatibility. It has an FHD+ resolution of 1080 x 2340 pixels and an aspect ratio of 19.5:9. The screen is protected by Gorilla Glass Victus 2 on both the front and back panels.
Under the hood, the Galaxy S23 is powered by the Qualcomm Snapdragon 8 Gen 2 processor, built on a 4 nm manufacturing process. It is an octa-core processor with impressive clock speeds. The smartphone runs on Android 13 with One UI 5.1 skin on top.
In terms of optics, the Galaxy S23 sports a triple camera setup at the rear, consisting of a 50 MP primary sensor, a 10 MP telephoto sensor, and a 12 MP ultrawide sensor. The front camera is a 12 MP sensor. The smartphone comes in multiple storage options, ranging from 128GB to 512GB, with 8GB of RAM.
Samsung Galaxy S23 Plus
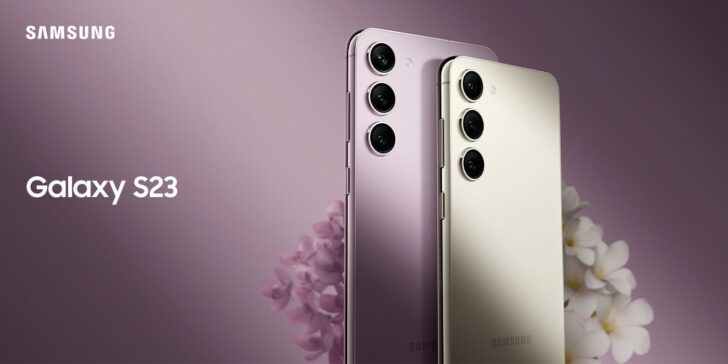
The Samsung Galaxy S23 Plus, on the other hand, boasts a larger 6.6-inch Dynamic AMOLED display with the same 120 Hz refresh rate and HDR10+ compatibility. It also has an FHD+ resolution of 1080 x 2340 pixels and an aspect ratio of 19.5:9. Like the Galaxy S23, it is protected by Gorilla Glass Victus 2.
The Galaxy S23 Plus shares many features with its sibling, including the Qualcomm Snapdragon 8 Gen 2 processor, Android 13 with One UI 5.1, and the triple camera setup. However, it comes in two storage options – 256GB and 512GB, both with 8GB of RAM. It also has a larger 4700 mAh battery with 45W fast charging support.
What is TWRP Recovery?
Team Win Recovery Project (TWRP) Recovery is a popular and highly regarded custom recovery for Android devices. It is an open-source software that provides users with a touch-screen-enabled interface to perform various tasks such as flashing custom firmware, taking backups, and more.
The advantages of TWRP Recovery are numerous. Here are some key benefits:
- Backups: TWRP allows you to create backups of system partitions in TAR or raw Image format. You can easily restore these backups from internal storage, external SD storage, or OTG devices.
- Custom Firmware: With TWRP, you can install custom firmware or custom ROMs on your Samsung Galaxy S23 and S23 Plus. This opens up a world of possibilities for customization and personalization.
- Flashable ZIPs and Image Files: TWRP supports the installation of flashable ZIPs and image files. This means you can easily flash mods, patches, or other files to enhance your device’s functionality.
- Partition Wiping: TWRP allows you to wipe various partitions on your device, including system, cache, vendor, and user data. This can be helpful when troubleshooting issues or preparing your device for a fresh installation.
- Rooting: TWRP Recovery provides an easy way to gain root access on your Samsung Galaxy S23 and S23 Plus using Magisk Manager. Rooting gives you privileged control over your device, allowing you to customize it to your liking.
Steps to Install TWRP Recovery on Galaxy S23 / S23 Plus
Before you proceed with installing TWRP Recovery on your Samsung Galaxy S23 and S23 Plus, there are a few prerequisites that you need to fulfill. Let’s go through them step by step:
1. Charge Your Phone
Ensure that your Samsung Galaxy S23 and S23 Plus is charged to at least 60% before installing TWRP Recovery. This will prevent any issues or interruptions during the installation process.
2. Take a Complete Backup
Before rooting your device, it’s crucial to take a complete backup of your data. This ensures that you have a copy of all your important files and settings in case anything goes wrong during the installation process.
3. Activate Developer Mode
To enable Developer Mode on your device, follow these steps:
- Go to the Settings menu of your Android device.
- Scroll down and go to About.
- Tap on Software Information, then tap on Build Number 7-8 times until you see a message that says “You are now a developer.”
Once Developer Options are enabled, toggle on the USB Debugging and OEM unlock options under the Developer Options menu.
4. Install ODIN Tool
To install TWRP Recovery, you’ll need to have the latest Odin tool installed on your PC.
5. Unlock the Bootloader
Before installing TWRP Recovery, you need to unlock the bootloader on your Samsung Galaxy S23 and S23 Plus. Follow the steps outlined here to unlock the bootloader. Remember to create a backup of your device storage and files before proceeding, as unlocking the bootloader will wipe all data on your device.
6. Download Samsung USB Drivers
Download and install the correct Samsung USB drivers for your Windows or Mac computer.
7. Download TWRP Recovery
Now, it’s time to download the TWRP Recovery for your Samsung Galaxy S23 and S23 Plus. Visit the links below to find the latest TWRP Recovery for your device:
8. Instructions to Install TWRP
Follow these step-by-step instructions to install TWRP Recovery on your Samsung Galaxy S23 and S23 Plus:
- Once you have downloaded the TWRP Recovery file, reboot your device into download mode.
- Flash the
vbmeta_disabled_R.tarfile in the USERDATA slot using ODIN and click start. - The device will boot into recovery mode and prompt you to wipe data. Follow the instructions to wipe data.
- Reboot to download mode again.
- Open Odin and add the TWRP Tar file in the AP slot. Click start to flash the TWRP Recovery.
- Once the flashing process is complete, reboot your device.
- In TWRP Recovery, go to Advanced > Terminal and type
multidisablerto disable encryption. - If the vendor complains about free space left on the device, run
multidisableragain to resize the vendor partition. - Go back to Wipe > Format Data and type
yesto format the data partition. - Congratulations! You have successfully installed TWRP Recovery on your Samsung Galaxy S23 and S23 Plus.
Root The Samsung Galaxy S23 and S23 Plus Using Magisk
Now that you have successfully installed TWRP Recovery, you can proceed with rooting your Samsung Galaxy S23 and S23 Plus using Magisk. Follow these steps:
- Download the Magisk Manager APK on your phone and place it in the internal memory.
- Reboot your device into recovery mode by pressing the Volume Up + Power button together.
- Make sure you have created a backup of your Samsung Galaxy S23 and S23 Plus.
- In TWRP Recovery, select Install and locate the Magisk.zip file. Swipe to install and flash Magisk.
- Restart your device.
- Congratulations! Your Samsung Galaxy S23 and S23 Plus are now rooted using Magisk.
Conclusion
In this comprehensive guide, we have covered the process of installing TWRP Recovery on Samsung Galaxy S23 and S23 Plus and rooting the devices using Magisk. By following the steps outlined in this article, you can unlock the full potential of your Samsung Galaxy S23 and S23 Plus, customize your device, and enjoy a wide range of features and customization options.
If you encountered any issues during the installation process, or if you have any questions or feedback, please let us know in the comments section below. Our team of experts is here to assist you and ensure that you have a seamless rooting experience.
Remember to proceed with caution and always create backups before making any modifications to your device. Happy rooting!