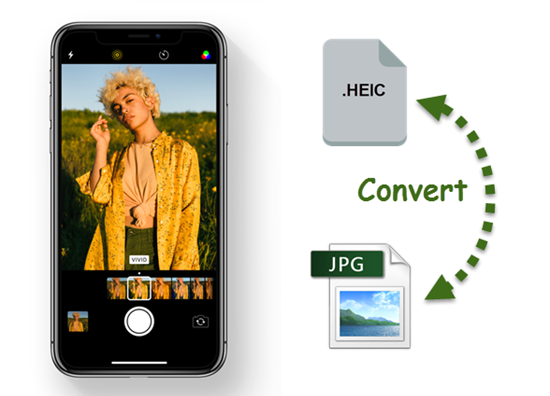
In today’s digital age, capturing high-quality photos on our smartphones has become a daily routine. However, the default image format on iPhones and iPads, HEIC (High Efficiency Image Format), may not be compatible with all devices and platforms. To ensure that your photos are accessible and shareable, it’s important to know how to convert HEIC to JPG format. In this guide, we’ll walk you through the various methods to convert HEIC to JPG on your iPhone or iPad.
HEIC and JPG Formats
Before we dive into the conversion methods, let’s briefly understand the differences between HEIC and JPG formats. HEIC is a relatively new image format introduced by Apple, known for its efficient compression that allows for smaller file sizes without compromising image quality. On the other hand, JPG is a widely supported image format that is compatible with almost all devices and platforms.
While HEIC offers advantages in terms of file size and image quality, it can pose compatibility issues when sharing or accessing photos on non-Apple devices or platforms. Converting HEIC images to the universally supported JPG format ensures that your photos can be easily viewed and shared across different platforms.
Method 1: Using the Files App
The Files app on your iPhone or iPad provides a convenient way to convert HEIC images to JPG format. Follow these steps to convert your HEIC photos using the Files app:
- Open the Photos app on your iPhone or iPad and locate the HEIC photo you want to convert.
- Tap the Share button (represented by a square with an arrow pointing upwards).
- Scroll down and tap Copy Photo. This will save a copy of the HEIC photo to your device’s clipboard.
- Open the Files app on your iPhone or iPad.
- Tap On My iPhone or On My iPad to access the local storage.
- Long-press on an empty area within the folder and tap Paste. The HEIC photo will be pasted into the folder and automatically converted to JPG format.
- Tap the converted image to share it or tap Save Image to save it to your Photos library.
Using the Files app provides a simple and efficient way to convert individual HEIC photos to JPG format. However, if you have a large number of HEIC photos, this method may be time-consuming. In such cases, it’s recommended to use alternative methods for batch conversion.
Method 2: Email Conversion
Another method to convert HEIC images to JPG format is by sending the photos to yourself via email. Follow these steps to convert HEIC photos using this method:
- Open the Photos app on your iPhone or iPad and locate the HEIC photo you want to convert.
- Tap the Share button.
- In the sharing options, tap Mail to create a new email with the HEIC photo attached.
- Enter your email address as the recipient and send the email.
- Check your email inbox on a computer or another device.
- Download the attached HEIC photo from the email.
- The downloaded photo will be in JPG format.
By sending the HEIC photo as an email attachment, the photo will be automatically converted to JPG format during the email transmission process. This method is useful when you need to convert a few HEIC photos and want a quick and easy solution.
Method 3: Changing Camera Capture Format
If you prefer to save all your photos automatically in JPG format rather than HEIC, you can change the camera capture format on your iPhone or iPad. Follow these steps to permanently convert all future photos to JPG format:
- Go to the Settings app on your iPhone or iPad.
- Scroll down and tap Camera.
- Tap Formats.
- Select Most Compatible.
- By choosing the Most Compatible option, your device will capture photos in JPG format instead of HEIC format.
Changing the camera capture format ensures that all photos captured using the built-in camera app on your iPhone or iPad will be saved in JPG format. However, please note that this setting will not convert existing HEIC photos to JPG format.
Checking if a File is in HEIC Format
If you’re unsure whether a file is in HEIC format, you can easily check it on your iPhone or iPad. Follow these steps to determine if a file is in the HEIC format:
- Open the Photos app on your iPhone or iPad.
- Locate the photo you want to check.
- Swipe up on the photo or tap the i button.
- Look for the Picture Format section. If it says HEIF, then the file is in HEIC format.
By checking the picture format, you can identify whether a file is in HEIC format or not. This can be particularly useful when you’re unsure about the compatibility of a specific file.
Do You Need to Convert HEIC Files to JPG?
Now that you know how to convert HEIC files to JPG format, you may wonder if it’s necessary to convert all your HEIC files. Here are a few factors to consider:
- Compatibility: Most modern devices and operating systems can read HEIC files with ease. However, if you frequently share photos with individuals using older devices or operating systems, converting HEIC files to JPG ensures compatibility.
- File Size: HEIC files are highly compressed and offer superior image quality compared to JPG files of the same size. If storage space is a concern, keeping your photos in HEIC format can save valuable storage space on your iPhone or iPad.
- Editing Capabilities: Some photo editing apps or software may have limited support for HEIC files. If you extensively edit your photos using third-party apps, converting them to JPG format may provide more flexibility in terms of editing options.
Ultimately, the decision to convert HEIC files to JPG format depends on your specific needs and preferences. Consider the compatibility, storage space, and editing capabilities to determine the best approach for managing your photo library.
Conclusion
Converting HEIC files to JPG format on your iPhone or iPad ensures compatibility and accessibility across different devices and platforms. Whether you choose to use the Files app, email conversion, or change the camera capture format, the process is simple and straightforward. By understanding the differences between HEIC and JPG formats and considering your specific requirements, you can make an informed decision on whether to convert your HEIC files to JPG.


