

Ready or Not, developed by VOID Interactive, is an intense tactical first-person shooter game that takes place in a modern-day world where SWAT police units are called upon to handle hostile situations. With its immersive gameplay and stunning visuals, Ready or Not has garnered hundreds of thousands of positive reviews on Steam. However, like any other game, it is not immune to technical issues. One common problem that players encounter is the “Out of Video Memory” error on PC.
In this comprehensive guide, we will explore the various causes of the Video Memory error in Ready or Not and provide you with step-by-step solutions to fix it. Whether you’re experiencing graphical issues, conflicts with the graphics card driver, or low memory problems, we’ve got you covered. By following the troubleshooting methods outlined in this article, you’ll be able to resolve the Video Memory error and get back to enjoying your gaming experience.
Possible Causes of the Video Memory Error
The Video Memory error typically occurs when launching the Ready or Not game on your PC. This error is often an indication that your PC’s configuration lacks the necessary video memory (VRAM) to handle graphics-intensive programs. There are several reasons why this error may occur, including:
- Outdated game version: Running an outdated version of the game can lead to compatibility issues and trigger the Video Memory error.
- Missing game files: If certain game files are missing or corrupted, it can result in the Video Memory error.
- Background running tasks: Other programs or tasks running in the background can consume system resources and cause conflicts with the game.
- System file conflicts: Conflicts between system files can disrupt the game’s performance and lead to the Video Memory error.
- Low memory issues: Insufficient physical RAM or VRAM can cause the Video Memory error when running graphics-intensive games.
- Graphics card driver conflicts: Outdated or incompatible graphics card drivers can result in the Video Memory error.
- Overheating: If your PC’s hardware becomes overheated, it can impact the game’s graphics performance and trigger the Video Memory error.
- Windows updates: An outdated version of the Windows operating system can lead to conflicts and errors, including the Video Memory error.
Now that we have a better understanding of the possible causes, let’s move on to the solutions.
Solutions to Fix the Video Memory Error
1. Ensure Your PC Specs are Compatible
Before diving into the troubleshooting methods, it’s essential to check if your PC meets the minimum system requirements to run Ready or Not smoothly. Outdated hardware or incompatible specifications can trigger low video memory errors. Here are the minimum and recommended requirements for Ready or Not:
Minimum Requirements:
- OS: 64-bit Windows 7, Windows 8.1, Windows 10
- Processor: Intel Core i5-4430 / AMD FX-6300
- Memory: 8 GB RAM
- Graphics: NVIDIA GeForce GTX 960 2GB / AMD Radeon R7 370 2GB
- DirectX: Version 11
- Storage: 90 GB available space
Recommended Requirements:
- OS: 64-bit Windows 10
- Processor: AMD Ryzen 5-1600 / Intel Core i5-7600K
- Memory: 8 GB RAM
- Graphics: Nvidia GTX 1060 6GB or better
- DirectX: Version 11
- Storage: 90 GB available space
If your PC falls short of these requirements, consider upgrading the specific hardware components to ensure smooth gameplay.
2. Check for Memory Usage
High memory usage can often lead to the Video Memory error. To identify if there is an issue with memory usage, you can check the system resources. Follow these steps to check memory usage:
- Press the Ctrl+Shift+Esc keys simultaneously to open Task Manager.
- Go to the Performance tab and click on Memory.
If you notice that the RAM usage is higher than expected (above 80%) while the CPU usage is minimal, it indicates that you may need more physical RAM to avoid the Video Memory error. Consider installing additional RAM sticks or upgrading your existing RAM to a higher capacity.
3. Force Close and Relaunch the Game
Sometimes, temporary conflicts between the game and the system can cause the Video Memory error. By force closing the game application and relaunching it, you can resolve these conflicts. Follow these steps to force close and relaunch Ready or Not:
- Exit and close the Ready or Not game application on your PC.
- Open the Task Manager by pressing the Ctrl+Shift+Esc keys.
- Go to the Processes tab and right-click on the ReadyorNot.exe task.
- Click on End Task and then relaunch the game.
4. Restart Your Computer
A simple restart can often resolve temporary glitches or cache data issues that may be causing the Video Memory error. Before restarting, ensure that you close all running programs. Follow these steps to restart your computer:
- Open the Start menu and click on the Power option.
- Select Restart and wait for your computer to reboot.
5. Try Closing Background Processes
Unnecessary background processes can consume system resources and cause conflicts with the game. By manually closing third-party background tasks, you can free up CPU and RAM resources. Follow these steps to close background processes:
Note: Only close third-party tasks and avoid closing crucial system processes unless you know what you’re doing. Closing essential system processes can lead to system crashes or other unexpected issues.
- Press the Ctrl+Shift+Esc keys to open Task Manager.
- Click on the Processes tab and select the specific task you want to close.
- Click on End Task to close the selected task.
- Repeat the same steps for other unnecessary third-party tasks.
- Once you’ve closed the desired background processes, close Task Manager and reboot your PC.
6. Update Ready or Not
Keeping your game up to date is crucial for optimal performance and compatibility. An outdated game version can lead to startup issues and low video memory errors. Follow these steps to update Ready or Not via Steam:
- Open Steam and navigate to your Library.
- Find Ready or Not in the list and click on it.
- Steam will automatically search for available updates.
- If an update is available, click on Update to download and install it.
- After the update is complete, restart your PC to apply the changes.
7. Scan and Repair the Game Files
Missing or corrupted game files can cause various issues, including the Video Memory error. You can repair the installed game files using the following steps:
- Launch Steam and go to your Library.
- Right-click on Ready or Not and click on Properties.
- In the properties menu, select the Local Files tab.
- Click on Verify Integrity of Game Files.
- The process may take some time to complete, so be patient.
- Once the verification is finished, reboot your PC to apply the changes.
8. Keep Your PC Cool Down
Overheating can affect your PC’s performance and lead to graphics issues. Ensure that your PC has proper air ventilation and is not overheating. If necessary, shut down your computer for at least 30 minutes to allow it to cool down. Make sure there is sufficient airflow where your laptop or desktop is placed. If the airflow is insufficient, consider changing the cooling fans or the cabinet.
9. Check for Windows Updates
Outdated versions of the Windows operating system can cause conflicts and errors, including the Video Memory error. To manually install Windows updates, follow these steps:
- Press the Win+I keys to open Windows Settings.
- Click on Update & Security.
- Click on Check for updates to search for available updates.
- If updates are found, click on Download and Install.
- Wait for the updates to install and then restart your PC to apply the changes.
10. Update the Graphics Card Driver
Outdated or incompatible graphics card drivers can cause the Video Memory error. To update your graphics card driver, follow these steps:
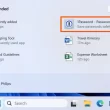
- Right-click on the Start Menu to open the Quick Link Menu.
- Click on Device Manager from the list.
- Double-click on Display Adapters to expand the category.
- Right-click on your dedicated graphics card and select Update driver.
- Choose Search automatically for drivers to let the system search for available updates.
- If an update is found, download and install it.
- After the installation is complete, restart your PC.
If you can’t find any pending updates through Device Manager, visit the official website of your graphics card manufacturer (Nvidia, AMD, or Intel) to manually search for and download the latest driver update.
11. Disable CPU or GPU Overclocking
Overclocking your CPU or GPU can sometimes cause issues with program performance, including the Video Memory error. If you have overclocked your CPU or GPU, consider disabling it temporarily or restoring it to the default settings. Tools like MSI Afterburner, Riva Tuner, AMD Ryzen Master, or EVGA Precision X can help you adjust overclocking settings.
12. Perform a Clean Boot
Certain apps and services may start automatically during the Windows startup, consuming system resources and potentially causing conflicts. By performing a clean boot, you can disable third-party services and prevent specific programs from running at startup. Follow these steps to perform a clean boot:
- Press the Win+R keys to open the Run dialogue box.
- Type msconfig and hit Enter to open System Configuration.
- Go to the Services tab and enable the Hide all Microsoft services checkbox.
- Click on Disable all, then click Apply and OK to save the changes.
- Go to the Startup tab and click on Open Task Manager.
- In Task Manager, click on the Startup tab.
- Disable the tasks that have a higher impact on startup by selecting them and clicking on Disable.
- Repeat the same steps for each program with a higher startup impact.
- Restart your computer to apply the changes.
13. Run the SFC Scan
The System File Checker (SFC) is a utility in the Windows system that scans for corrupted system files and restores them if necessary. By running an SFC scan, you can fix any corrupted files that might be causing the Video Memory error. Follow these steps to run an SFC scan:
- Open the Start Menu and type cmd.
- Right-click on the Command Prompt app and choose Run as administrator.
- If prompted by UAC, click on Yes to continue.
- Type the following command and press Enter to execute the System File Checker process:
sfc /scannow- Wait for the process to complete.
- Once the scan is finished, close the Command Prompt and restart your computer.
14. Increase the Virtual Memory
If your physical RAM capacity is low, increasing the virtual memory can help alleviate the Video Memory error. Virtual memory acts as a supplement to physical RAM, allowing your system to allocate more memory to running programs. Follow these steps to increase the virtual memory:
Note: You must have administrator privileges to complete this process. Additionally, network policy settings may also impact this process if your computer is connected to a network.
- Open the Start menu and click on Control Panel.
- Click on Performance and Maintenance and go to System.
- From the Advanced tab, click on Settings under Performance.
- On the Advanced tab, click on Change under Virtual Memory.
- Select the drive that contains the paging file you want to change.
- Click on System Managed Size under Paging file size for the selected drive.
- Click on Set and save the changes.
- Restart your PC to apply the changes.
By following these solutions, you should be able to resolve the Video Memory error in Ready or Not and enjoy a seamless gaming experience.
Conclusion
The Video Memory error can be frustrating when trying to launch Ready or Not on your PC. However, with the solutions provided in this guide, you can troubleshoot and fix the issue. Remember to check your PC’s compatibility, monitor memory usage, update the game and graphics card drivers, close unnecessary background processes, and perform other troubleshooting steps as outlined above. By following these steps, you’ll be well on your way to resolving the Video Memory error and enjoying a smooth gaming experience with Ready or Not.