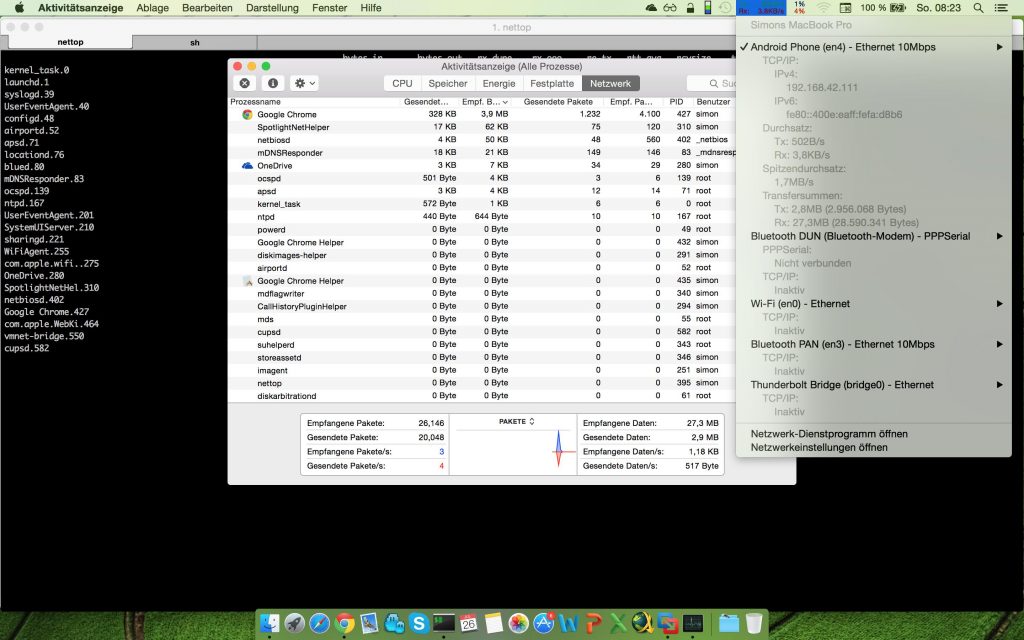
Since Apple started supporting iOS 14, some iPhone users are receiving a warning message that the Wi-Fi network with which they are connected is blocking encrypted DNS traffic. DNS is a useful feature that makes it harder for snoopers who are using the same Wi-Fi as you to see the domain names of the website you are visiting while connected to that Wi-Fi. You may face this warning because Apple’s mobile OS supports domain name encryption.
It is very usual to panic at that moment, but in reality, there is nothing to worry about as it only indicates that the Wi-Fi network does not meet the security standards recommended by apple. In that case, you can see the privacy warning appearing on the information screen for a Wi-Fi network. You can visit this screen by going to settings and then Wi-Fi or tapping on the circled I located next to a listed network.
As there are several Wi-Fi routers and network settings, it is very complex to offer a method for the specific router connection you are using. If you are getting irritated by the warning messages, here are some methods mentioned below that you can try to get rid of.
Ways to fix wi-fi blocking encrypted DNS traffic issue:
Restart your iOS device
Sometimes, a normal restart can do the work for you that many other methods cannot do. That’s why before trying any complex troubleshooting method, you should try to restart your iOS device.
Forget Network on your iOS device and reconnect
Go to your Wi-Fi settings and press and hold the Wi-Fi network. Here you will be provided with an option, forget this network. Tap on that option and forget that Wi-Fi network. Now, wait for few seconds, and then reconnect your device with that Wi-Fi.
Restart your Wi-Fi router
You can try to turn off your Wi-Fi router and turn it on after a few seconds. For some users, this method worked.
Make sure your router’s firmware is up-to-date
Your router’s firmware should be up to date always, and when you have the warning message on your iPhone, you have to make sure of that.
Go to the settings of your Wi-Fi router and try to set up your router according to Apple’s recommendation. Apple has some safety recommendations for routers, and if you can set up your router according to that, you wouldn’t see the warning message again.
Change the admin password of your router
Many users have reported that they have stopped having the warnings when they have changed their router’s admin name and password. For that, enter the IP address of your router in a new browser tab to open the administration page.
After that, you have to go to settings and the reset password option. Enter your current password and your new password to reset.
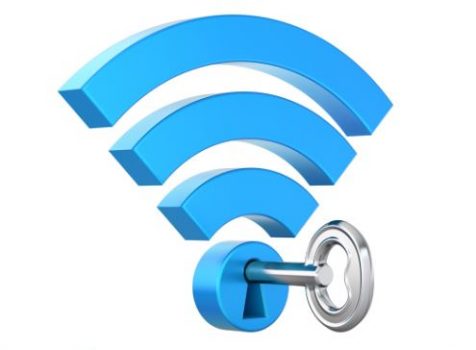
Check your router’s security settings
Your router is connected to your privacy, and you have to make sure that your router is secure enough. Ensure to use the best data encryption settings for your router. You should use the WPA3 protocol to improve the security as this works with all devices that support Wi-Fi6. If you are looking for the secure encryption for older devices, you can use the hybrid WPA2/WPA3.
Go to your router settings
Select your Wi-Fi
Click on your access point
Move towards advanced
Select security and enable the security protocol WPA3 or WPA2/WPA3.
Check whether you have the latest firmware update or not.
Make sure to enable all available wireless options on your device, along with all bands supported by your router, to enhance the capacity and performance of your network. You can simply visit Apple’s page to meet the requirements and use a more secured network.
Choose a reliable network provider
You have to go for a reliable network provider. If your network provider is tracking DNS communications, you will get a warning on your iOS device. ISPs can track and store users’ online activities and sell the data to third-party vendors to provide personalized ads to the user. To avoid getting tracked, you can install a VPN on your device.
Experiencing difficulties with your Device, check out our “How To” page on how to resolve some of these issues.