


We’ve been seeing some early unofficial LineageOS 18.1 builds on the xda-Developers forum as of late. But at the start of April 2021, the team behind the popular custom ROM officially announced the new update, LineageOS 18.1. Over 60 devices are said to be supported in this first round of LineageOS 18.1. Today, we will show you how to update from an official LineageOS 17.1 to LineageOS 18.1. We will be using the Essential phone as an example in this tutorial. However, this update process should be the same across all these first device batches. We can’t guarantee that this will work whenever you update from an unofficial build of LineageOS 17.1 to an unofficial build of LineageOS 18.1.
Prerequisites
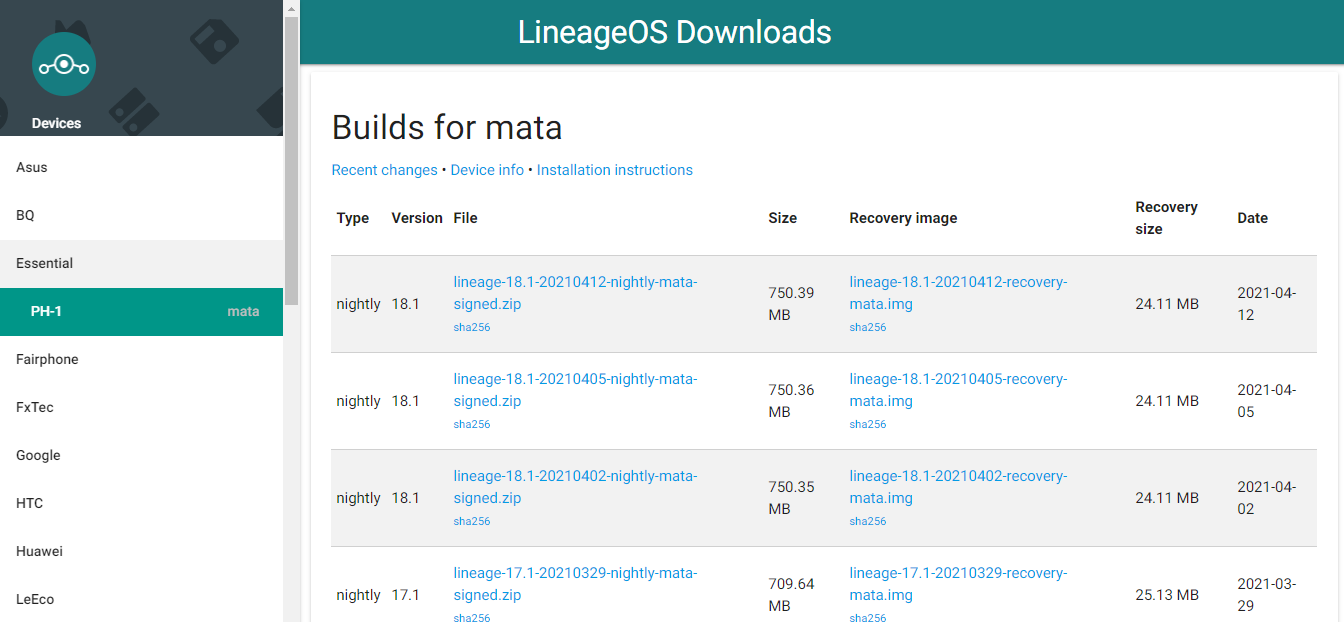
So, to begin this process, you’re going to need to download a couple of things ahead of time. You need to download the new LineageOS 18.1 build for your device.
- To download the official build, just go to Google and search for LineageOS download.
- You will see the official download page of LineageOS; click on it to open it.
- Tap on the hamburger menu at the top left of the page. You will see the list of supported devices; you can just look for your device.
- We’re going to download the ROM and recovery image.
It would help if you also had ADB and Fastboot tools on your PC/laptop, so please check out our previous guide.
If you want to install Google apps on LineageOS 18.1, you need to download a “G Apps” package.
However, as of the time of writing this tutorial, open “G Apps” does not have an Android 11 package.
So, we will be using the mind the G Apps alternative. With all of that done, we will go into the settings application and enable USB debugging mode.
To enable it, go to the About section page in the settings application, then go to the software information and tap on the build number seven to eight times.
Setting Up Your Device
Now go back to the settings’ main page, search for the developer’s option, and go into the developer’s option page.
In the developer’s option, look for Android debugging/USB debugging and enable it by switching the toggle next to it to the right.
Updating to LineageOS 18.1
So, with the Android/USB debugging option enabled, we can connect our phone to our PC with a USB cable.
Afterwards, we will go ahead and run the ADB service.
The instructions on the LineageOS website say that we also need to enable root access options and then enable ADB only for root.
We could not find that on this device, maybe it’s because of an outdated version.
There is a “rooted debugging” option, which seemed similar, but we are not exactly sure why they’re asking us to enable root. The following instructions tell us to run a command ADB reboot sideload, and when we type that out, as long as ADB or USB debugging is enabled and we have allowed access from the device and when we press enter, it will restart the phone.
At least it’s restarting our smartphone even without root access so that we can begin the sideload process.
We don’t think all the instructions’ on root access and ADB-only options are required. If you can boot into recovery mode and enable ADB sideload mode.
So it doesn’t matter how you get into ADB sideload mode on your custom recovery; we just need to have either TWRP or lineage OS recovery installed on our device booted into recovery mode, then enable ADB sideload mode.
Once we have our smartphone in our custom recovery and in sideload mode, we can connect our smartphone to our PC with a USB cable.
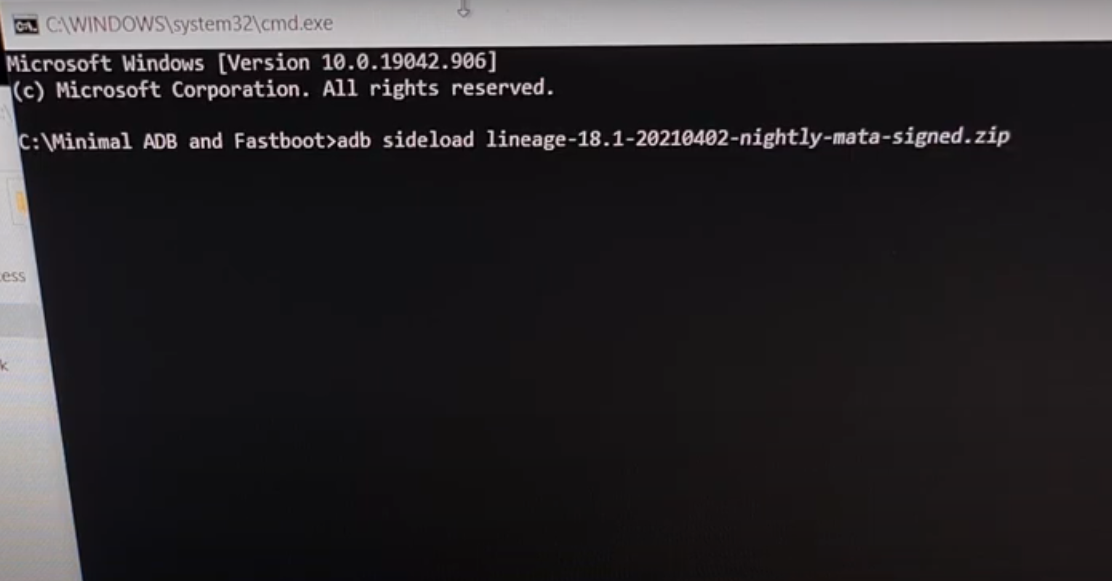
Copy the LineageOS 18.1 zip file which you downloaded from the website to the ADB and Fastboot tools folder.
Also Read:
How do you disable all Bixby Services on the Samsung Galaxy S21 Series with ADB?
This file needs to be in the same folder as your ADB and Fastboot tools.
We will type out the command adb sideload and whatever the file name is that you downloaded, should follow after.
- You can rename this file to lineageos.zip if you want to, just so that it’s easier to type out.
- So again, make sure your phone is in recovery mode and in sideload mode, waiting to accept commands.
- Once we type it out, we’re just going to press Enter.
- Then, it will send this update from our PC to our device before it begins updating from LineageOS 17.1 to LineageOS 18.1.
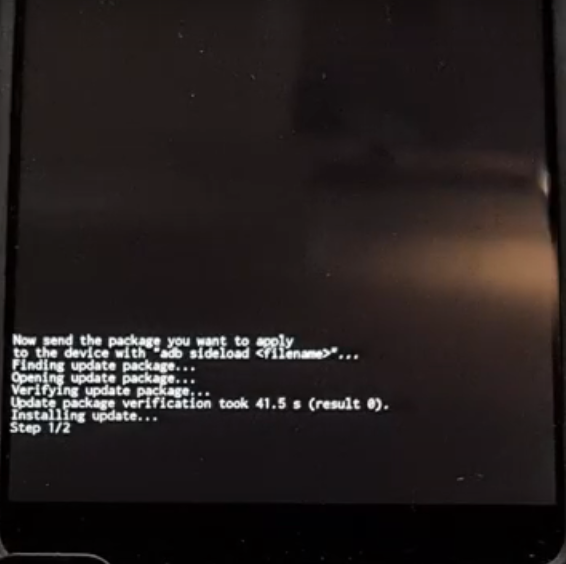
- Now, on our phone, we’re being told that the device is finding that updated package.
- It opens that update package and will verify that it has been updated.
- Once you see that the command prompt screen on your PC gets to 47%, you should also see the phone saying updated or installing the update. It will switch from verifying the update package to installing the update.
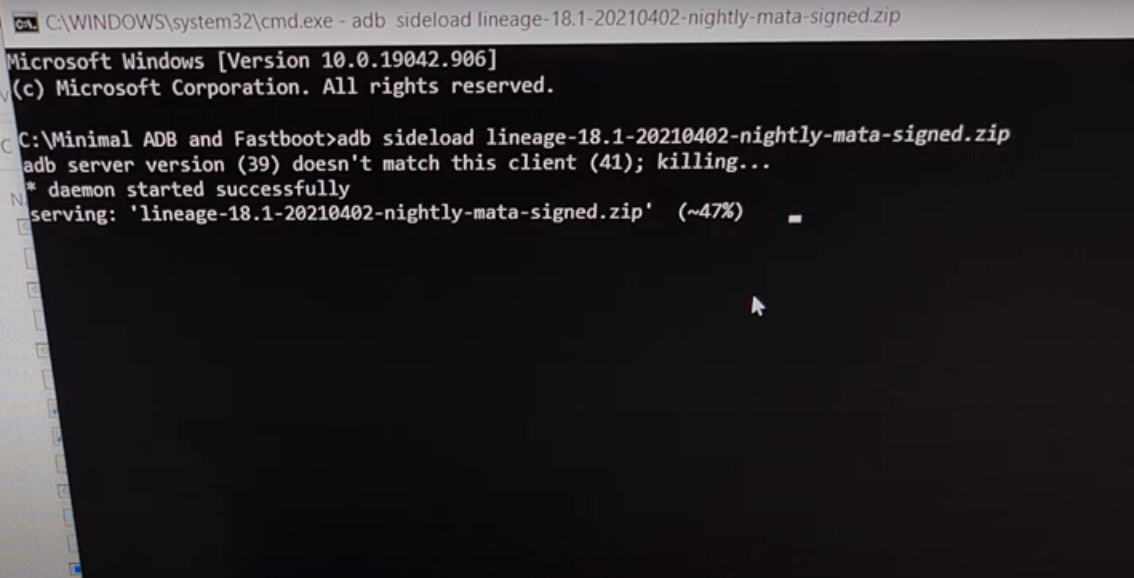
- This will stay at 47% for a minute, our device is currently displaying that we’re at step one of two.
- We just simply need to wait a little bit for the phone to install the big update.
After it completes step one of two we can see that it instantly goes to step two of two, again we just need to be patient as it will again take some time.
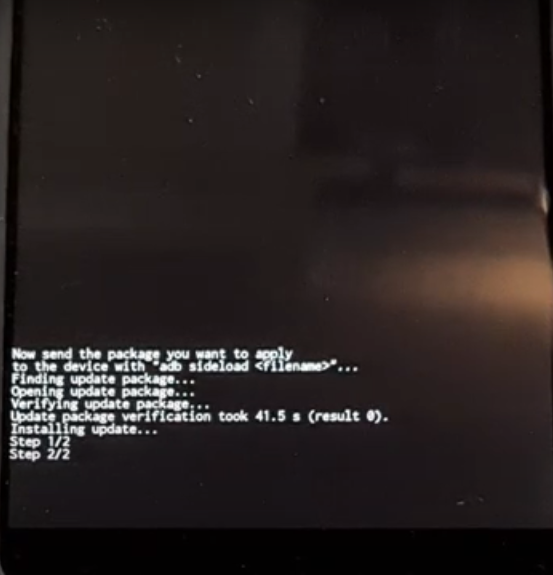
You should expect to see an ADB fail to read the command on your command prompt. That’s fine. You should also be getting a status 0 message on your phone. We should be good to go as long as we don’t get any error messages on the PHONE.
Installing Additional Packages
- Now, if you are installing the Google Apps package, you will do the same things basically.
- You will copy and paste the “G Apps” zip file into the same folder as your ADB and Fastboot tools.
- Then you’re going to go into the apply update so that we can send an update from ADB and then we’re going to do the ADB sideload command just like we did for the actual custom ROM update.
- But we’re going to do it for the Google Apps package and after that, if you want to install Magisk, you can do so as well.
- We will copy the Magisk zip file to the ADB and Fastboot tools folder. We will go into the apply update section and enable the ADB sideload mode. Then we’re going to do the ADB sideload and then select the Magisk zip file.
- Now, if you have TWRP installed, you can flash those zip files like you usually do after you have done the ADB sideload.
We won’t be doing that here; we’re just updating LineageOS from 17.1 to 18.1.
Finalizing the Update
- After ADB sideloading the 18.1 updates, we will finish with sideloading any other updates. We will go back to our main screen, where we will make sure the reboot system now option is highlighted.
- We will press the power button to select that option, and this first boot back into Android may take a little bit longer than usual. This is because the operating system needs to set some things up.
- We have not done a factory data reset, we have not erased anything, and we are keeping all of our data.
- We are just updating from LineageOS 17.1 to LineageOS 18.1.
- You should see that you are still on Android 11.
- You can also go into the about the phone section and check; we’re at Android 11 based on LineageOS18.1 and on the March security update with a build date of April 1st.
So that is how to update LineageOS 17.1 to the official LineageOS 18.1.
Experiencing difficulties with your Device, check out our “How To” page on how to resolve some of these issues.


Hi
Thank you for your explanation.
I have done it with my Samsung a5 from 2017 !
One question: when I boot to recovery mode, it is still the lineage recovery 17.1.
How to update the recovery to 18.1?
Thanks again.
Eric